|
|
 |
•
•
•
•
|
Our standard specification reduces the allowable errors
of DIN 863 to maximum 50%.
100% checking and calibration at 20°C with gauges,
which confirm with national standards.
Deep engraved scale with sharp edge, black coloured -
better reading than cheep laser-engraved scales.
Heavy, torsion-resistant frame, which will survive a
crash without damage.
|
 |
1063 |
 |
for grinding and inspection |
|
|
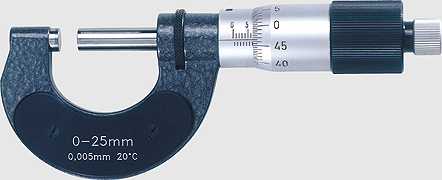
 Reading 5 µm
 Measuring range 0-25...275-300 mm
 Pitch 0,5 mm
 Spindle-Ø 8 mm (with carbide)
 Friction clutch-Ø 25 mm on thimble
|
|
 |
 |
1168 |
 |
for turning and milling |
|
|
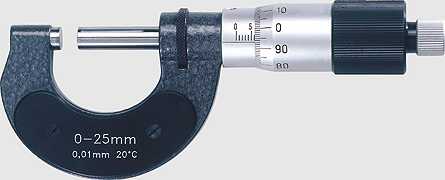
 Reading 0,01 mm without addition
 Measuring range 0-25...275-300 mm
 Pitch 1 mm, 100 divisions
 Spindle-Ø 8 mm (with carbide)
 Friction clutch-Ø 25 mm on thimble
|
|
 |
 |
4068 |
 |
for big measuring ranges |
|
|
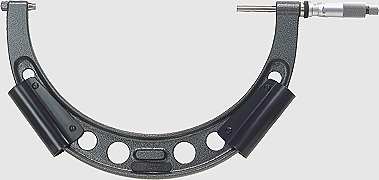
 Spindle 50 mm able to screw
 Measuring range 0-50...950-1000 mm
 Reading 0,01 mm without addition
 Pitch 1 mm, 100 divisions
 Thimble-Ø 24 mm
 Spindle-Ø |
8 mm |
(with carbide) up to |
300 mm |
|
10 mm |
(with carbide) up to |
1000 mm |
|
|
 |
 |
2883 |
 |
with high-quality pointer |
|
|
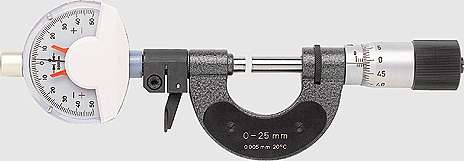
 Comfortable lever-operation
 Measuring range 0-25...75-100, 100-150...250-300 mm
 Reading 5 µm at micrometer, 1 µm at dial gage
 Pitch 0,5 mm
 Spindle-Ø 8 mm (with carbide)
 Thimble-Ø 25 mm
|
|
 |
 |
5077 |
 |
for gear-width measurement |
|
|
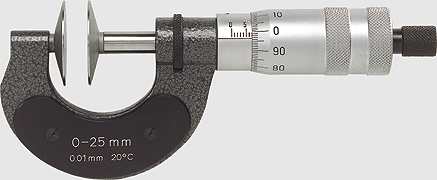
 Measuring disc-Ø 30 mm, starting 300 mm 35 mm respectively
 50 mm, measuring disc totally plain
 Thimble-Ø 24 mm
 Measuring range 0-25...275-300, 300-350...950-1000 mm
 Reading 0,01 mm without addition
 Pitch 1 mm, 100 divisions
|
|
 |
 |
5142 |
 |
for grooves and
thin notchs |
|
|
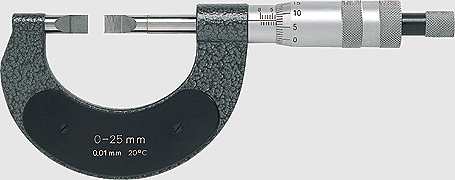
 Spindle non rotating
 Measuring range 0-25...225-250 mm
 Reading 0,01 mm
 Pitch 0,5 mm
 Measuring faces width x deep 0,4x4, 0,75x7 or 2x10 mm
|
|
 |
 |
5267 |
 |
for thread-flank measurement |
|
|
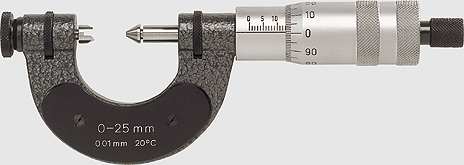
 Borehole-Ø for inserts 4 mm
 Inserts and gages for ISO 60°, Whitworth 55°
 and trapezoidal thread 30° (DIN 103) available.
 Measuring range 0-25...125-150, 150-200...250-300 mm
 Reading 0,01 mm, without addition
 Pitch 1 mm, 100 divisions
 Thimble-Ø 24 mm
|
|
 |
 |
7565 |
 |
for tube wall thickness measurement |
|
|
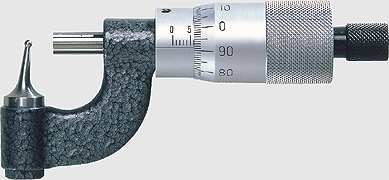
 Spherical laped anvil
 Measuring range x anvil-Ø |
0-15 mm x 2,5 (5) mm |
 Reading 0,01 mm without addition
 Pitch 1 mm, 100 divisions
 Thimble-Ø 24 mm
|
|
 |
 |
6266 |
 |
for measuring workpieces in
shape of discs |
|
|
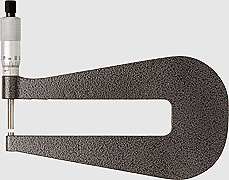
 With deep and angular frame
 Measuring range 0-25, 25-50, 0-50, 50-100 mm
 Frame depths 50, 100, 150, 250 mm
 Reading 0,01 mm without addition
 Pitch 1 mm, 100 divisions
 Spindle-Ø 6,5 / 8 mm (with carbide)
 Friction clutch-Ø 24 mm
|
|
 |
 |
7981 |
 |
for exactly internal measurement |
|
|
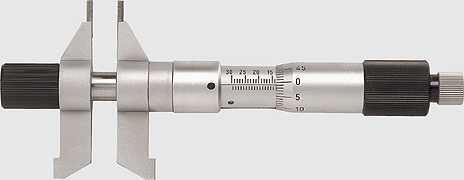
 Leg-inside micrometer with ball-bearing spindle and
 measuring faces out of carbide
 Measuring range 5-55 mm, legs on both sides with two
 seperate inner sleeves
 Measuring range 50-75...175-200 mm, legs at one side
 Reading 0,01 mm
 Pitch 0,5 mm
 Friction clutch-Ø 25 mm on thimble
|
|
 |
 |
8181
8191 |
 |
for internal measurement |
|
|
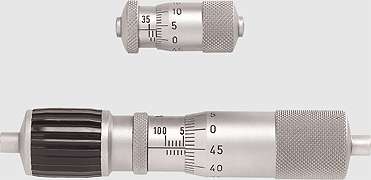
 Cheap construction for internal measurement
 Measuring range 25-30, 30-35, 35-50, 50-75...975-1000 mm
 Reading 0,01 mm
 Pitch 0,5 mm
 Measuring faces-Ø 6 mm (with carbide), spherical laped
|
|
 |
 |
8731 |
 |
for big internal measurement |
|
|
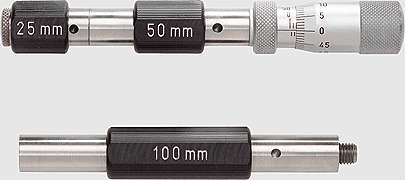
 With interchangeable extension rods
 Measuring range 50-150/50-250/50-450/50-850/50-1450 mm
 Reading 0,01 mm
 Measuring head 25 mm able to screw
 Pitch 0,5 mm
 Thimble-Ø 17 mm
 Measuring faces with carbide, spherical laped
|
|
 |
 |
9150 |
 |
for depth measurement |
|
|
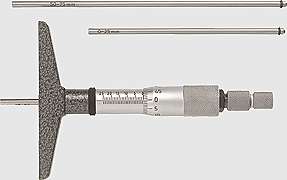
 Interchangeable inserts, measuring bridge 50 or 100 mm long,
 17 mm width
 Measuring range up to 300 mm
 Reading 0,01 mm
 Pitch 0,5 mm
 Thimble-Ø 20 mm
|
|
 |
 |
3130
3745 |
 |
built-in micrometers for plane tables, appliances...
|
|
|
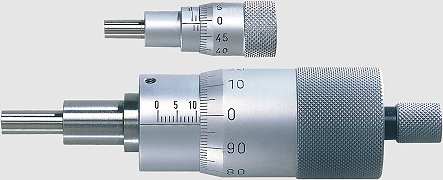
 Measuring range 0-5 up to 0-60 mm
 Reading 2 µm / 5 µm / 0,01 mm
 Pitch 0,1 / 0,25 / 0,4 / 0,5 / 1 mm
 Thimble-Ø 9,5 up to 50 mm
|
|
 |
|
|

